Hi Everyone
As you know collaboration tools integrations with service management solutions become very important after the COVID situation and a lot of our customers asking about its possibility.
We already have great Teams Integration and much more coming up but I want to give some information about what can we do in SMAX using Power Automate and Power Virtual Agent, and this is a good usecase. So, I created a SMAX – Teams Chatbot integration using Power Virtual Agent and Power Automate products.
There are two phases of this integration.
- Creating a chatbot using Power Virtual Agent and publishing to Teams application.
- Creating Power Automate flows for making API calls to SMAX.
Creating a chatbot using Power Virtual Agents
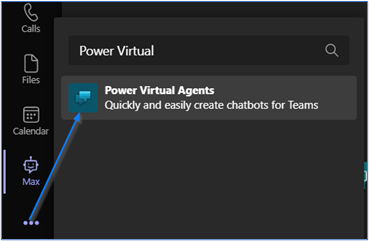
The first thing to do is creating a chatbot for end-users to interact. Power Virtual Agents is allowing us to create chatbots for collaboration tools, websites, and applications.
You can use Power VA web-based application, but I am highly recommending using the Teams desktop application because, in the next steps for verifying a user’s identity during a conversation, an authentication process will be needed. To do this verification certain AAD or any OAuth2 parameters required.
But Power VA Teams Desktop application allows Teams application to handle this with the “Only for Teams” authentication option and there is no additional information needed. But the downside is you cannot use the bot on any other platform besides Teams.
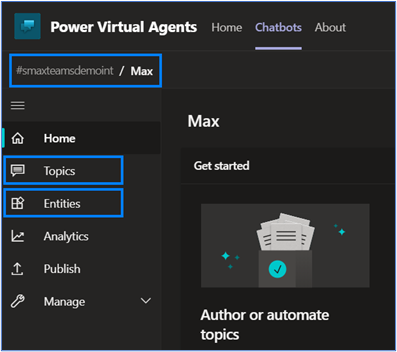
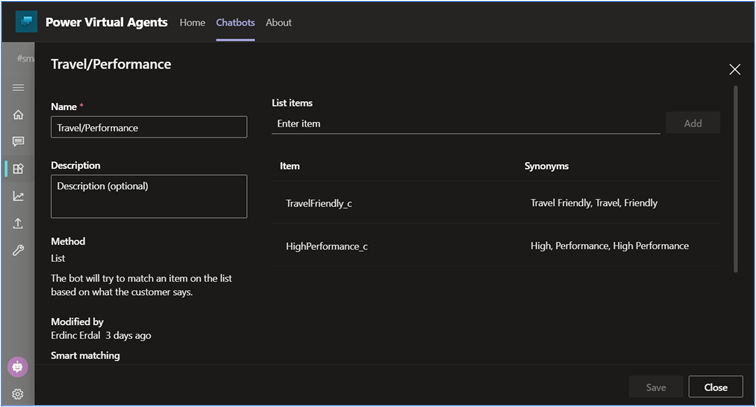
After named our bot, a separate bot configuration page will be available, for this integration we will use Topics and Entities. Topics will allow us to create scenarios, business cases step by step, and entities will help us define the information that the bot might want to pick out of a conversation with the end-user.
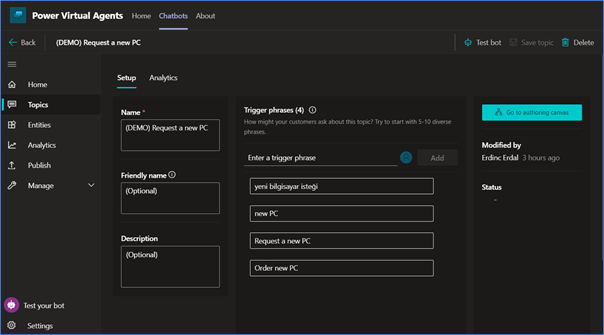
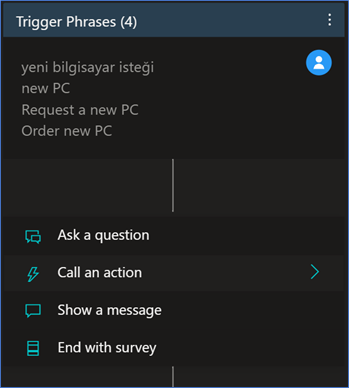
I use one of our demo environment offerings (DEMO) Request a new PC for creating a Topic. In the new topic creation area, you will define the trigger phrases end-user might type, and go to authoring canvas to start creating a scenario for an offering in SMAX.
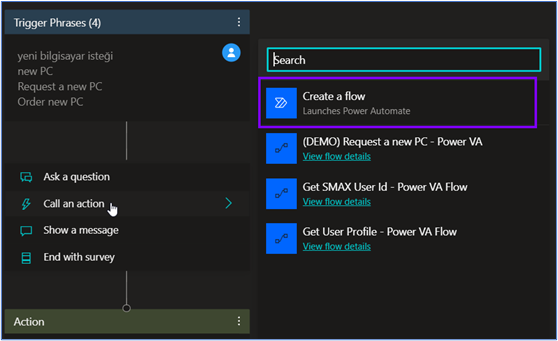
As you can see below you can start defining what will happen after the trigger phrase typed by adding “nodes”, you can ask a question, send a message, call an action (Power Automate flow) which we will use a lot, or add a condition depend on a question or an action output, etc.
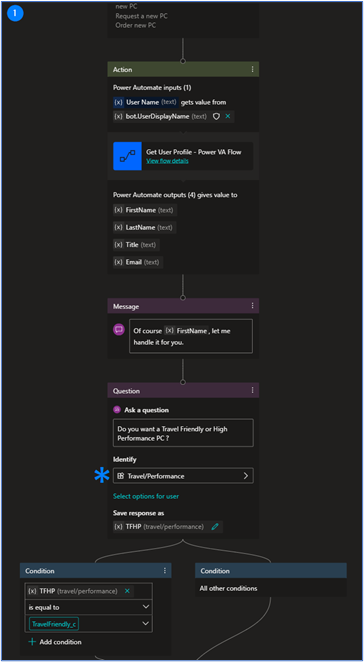
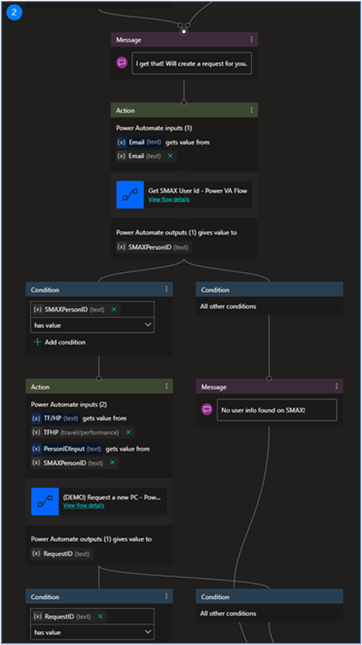
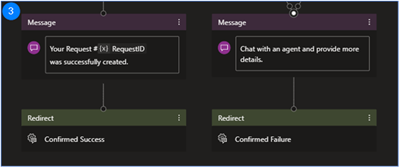
The (DEMO) Request a new PC topic is self-explanatory, other than calling actions which where the real magic happens, there is one question node for asking end-users for which type of computer they want and several messages for letting end-users know what Max is doing or done.
* You can use NLU entities in questions to define which answers end-users might provide and map them to which item for topics to progress to the next node.
Creating Power Automate flows for making API calls to SMAX
For (DEMO) Request a new PC topic we will make three “Call an action” nodes which will trigger Power Automate flows.
- Get User Profile – Getting email address from office365
- Get SMAX User ID – Getting a user ID for a matched email address from a SMAX tenant.
- (DEMO) Request new PC – SMAX Request record creation flow
Get User Profile
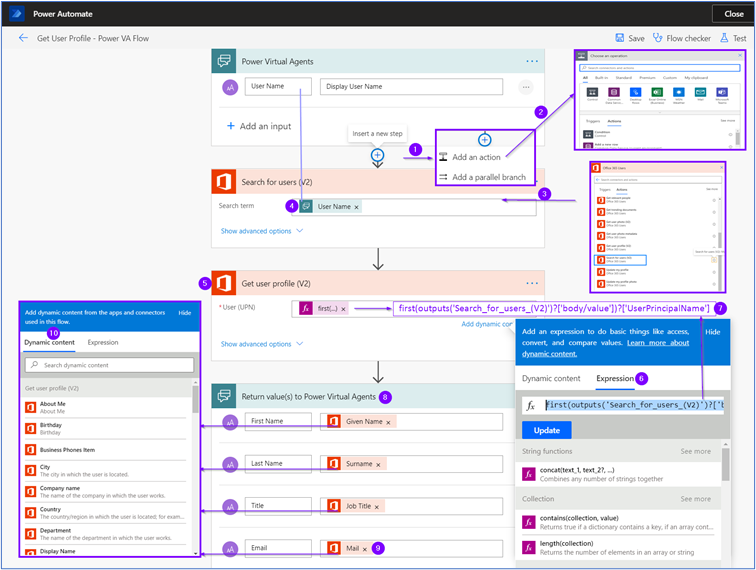
Of course, we need user information to authenticate and create records for the correct person. Thanks to Teams, the “Only for Teams” authentication option allows us to see the “UserDisplayName” and the “UserID” parameters of end-users. Bu for creating records on SMAX, we need to know the SMAX Person ID of the requester and at the same time, we need a unique identifier in both systems. In this case, we will use the email address of the end-users to address this issue. So, we will find the requester’s email address using the “bot. UserDisplayName” parameter from Teams and the Office365 “Get user profile” action in Power Automate.
You can find the Power Automate flow details in the below screenshot.
first(outputs(‘Search_for_users_(V2)’)?[‘body/value’])?[‘UserPrincipalName’]
Power VA automatically detects what input is needed and what will be the outputs after the above PA flow is selected. We will map User Name input in the PA flow to the bot.UserDisplayName parameter to use username as an input.
Get SMAX User ID
Now we will create an action node to get the SMAX Person ID, as an input, we will use the email address parameter we get from the previous step.
As you can see below Power Automate flow, we are making two API calls using HTTP actions to authenticate the SMAX tenant, another one for getting the Person ID of the end-user.
The returned body should look something like this;
Now we have the token/authentication key, and this key (returned body of the SMAX Authentication call) will be the Cookie for the next API call with the LWSSO_COOKIE_KEY prefix.
To get Person ID, we will use the GET method in another HTTP action for making API call.
https://<HOSTNAME>/rest/<TENANT_ID>/ems/Person?layout=Id&filter=Email='<DYNAMIC_CONTENT>’
The returned body should look something like this;
{ “entities”: [ { “entity_type”: “Person”, “properties”: { “LastUpdateTime”: 1616075425656, “Id”: “10016” }, “related_properties”: {} } ], “meta”: { “completion_status”: “OK”, “total_count”: 1, “errorDetailsList”: [], “errorDetailsMetaList”: [], “query_time”: 1617267511387607 } }
Now we have the “Id” information we need. To turn this “Id” information into a dynamic parameter, we will use Parse JSON action like below. You can create a schema for parameters by copying your output using the “Generate from sample” button.
Because the “Id” information in an array labeled as “entities” and an array might include more than one “Id” object we need to use Compose action to get the first object of the array and to do that we will use the expressions. (I was using an excel file in the first version to r/w Id’s but this method is much more effective )
first(body(‘Parse_JSON’)?[‘entities’])
Lastly, we will use a Parse JSON action to mapping parameters and return these parameters to Max using Power Virtual Agents action.
(DEMO) Request new PC PA Flow
For the last step, we will create a request in SMAX tenant and get the Request ID to show end-users.
This PA flow is very similar to the Get User ID flow, the only difference is we will make a POST API call to create a request.
Sending User Options might be tricky but thanks to and the community, I manage to send it.
https://<HOSTNMAME>/rest/<TENANT_ID>/ems/bulk { “entities”: [ { “entity_type”: “Request”, “properties”: { “Description”: “(DEMO) Request a new PC <DYNAMIC_CONTENT> “, “DisplayLabel”: “(DEMO) Request a new PC <DYNAMIC_CONTENT>”, “RequestedForPerson”: “<DYNAMIC_CONTENT>”, “RequestsOffering”: “12468”, “RequestedByPerson”: “<DYNAMIC_CONTENT>”, “Urgency”: “SlightDisruption”, “UserOptions”: “{“complexTypeProperties”:[{“properties”:{“SelectPCType_c”:”<DYNAMIC_CONTENT>”}}]}” } } ], “operation”: “CREATE” }
After that using the same steps in the “Get SMAX User ID” flow we are sending the Request ID parameter to the Max.
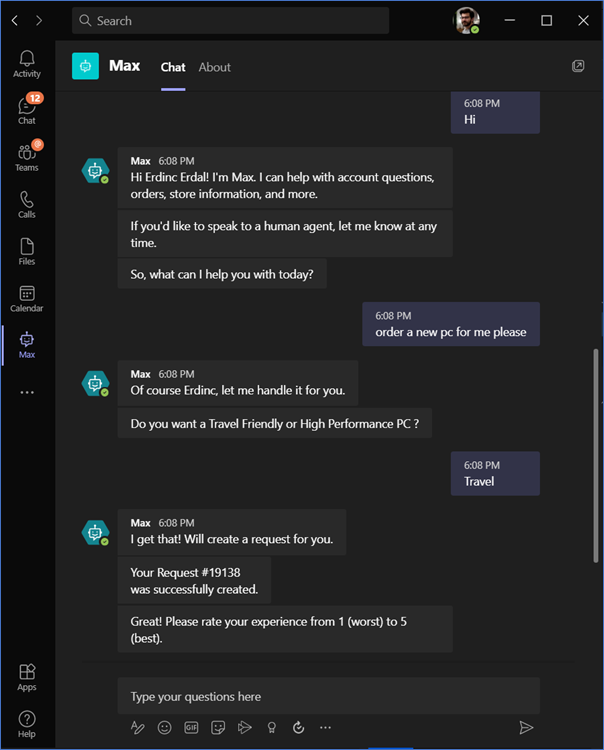
Finally, the requester can get an answer from Max, like below.
This is just a small example of what can be done using Power products and SMAX. I hope this could help.
SMAX Rocks!!
Erdinç ERDAL
erdinc.erdal@microfocus.com


